Tuesday, 27 May 2014

Fine Motor Fun With Eye Droppers

As I teach a class of three year olds, I am always trying to provide the children with fun and interesting fine motor activities. I try to plan a wide range of activities using different materials that encourage the children to explore the activity.
Ideally, the activity should motivate the child to want to explore the possibilities, learn through playing with the materials and talking to others throughout the experience.
Whenever I put out the eye droppers, this is exactly what happens. All of the children want to use them and enjoy the learning experience.
These are the eye droppers I have in my classroom.


The children need to gently squeeze the top of the eye dropper with their thumb and index finger to fill the dropper. They then need to squeeze the top again to release the dye. Some children need help initially but when they understand how to use it, they LOVE it!!

Here are some examples of how I have used eye droppers in my classroom to help develop the childrens fine motor skills.


Cute Class Bunting
After drawing a self portrait on absorbent paper with a permanent marker, the children used the eye droppers to cover their picture with dye. Not only was this a great fine motor activity but also could be used to discuss colour mixing.
Once they were dry, I laminated them and threaded them on some rope so they could be hung outside.


Dropping Dye On Sand
I put white sand in flat boxes and let the children drop dye onto the sand. I gave them water in spray bottles to then spray the dye. They were fascinated with this activity and it promoted lots of descriptive language.


Using Eye Droppers For Finger Painting
The children enjoyed using the eye droppers to drop dye onto shaving cream that that had been spread out on a tray. They then used their hands to mix the coloured dye together to make wonderful swirls and colours. We carefully placed paper on top and took beautiful prints.


You could let your child use an eye dropper in the bath, with water in the water trolley or to mix coloured dye in jars.
Have fun!!
Niccola

Tuesday, 20 May 2014

Number Houses

This is a really fun way to teach young children the numbers from 1-5. It is a hands on, play based activity that teaches the child to recognise the individual numbers, match the numbers, put the numbers in the correct order and count the correct number of counters for each car.

 I had 5 plastic bottles lying around at home and began by washing them and taking off the labels. I then cut them down with a craft knife and used scissors to cut door ways out of them. Make sure you cut the door ways big enough to fit the cars you are using.


I then drew some windows and plants with a permanent marker, and of course the numbers from 1-5.
I was planning on using this activity on the light table but you could use it anywhere, even in the sand pit!


I used some little plastic trucks I had in the classroom which were a perfect size. I stuck the numbers 1-5 on the trucks, added a paper street, some trees and some coloured counters and we were ready to play.


The children put the houses in the correct order and drove the trucks and cars into the matching house. I encouraged the children to count the correct number of counters and put them in the trucks.


The only problem we had was that everyone wanted to play at the light table all at the same time!
You know I love your comments so please let me know what you think.
Niccola
Tuesday, 13 May 2014

Creative Uses For A Dip Platter


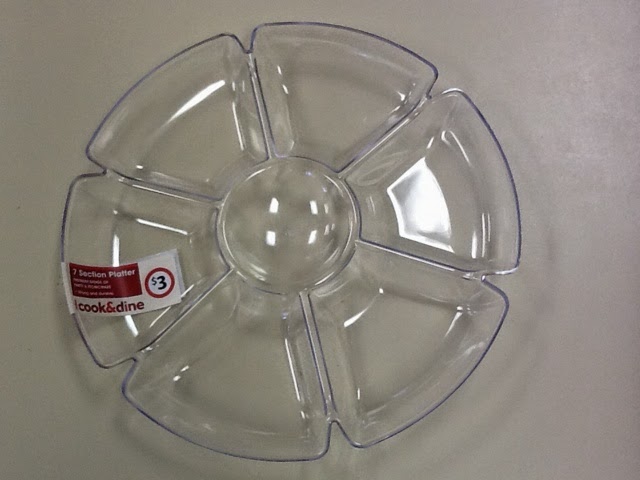
I am always looking for new and interesting ways to entice children to play, create and learn. I have a large collection of baskets, bowls, trays and containers at home and at school but recently bought a clear section platter with separate compartments. It cost $3.00 and I am pretty excited because it allows me to set up some interesting invitations to explore various materials and I haven't used it yet for the intended purpose although think it will be great for snack time!!


1. Colour Sorting
Stick pieces of paper or card with the colours you are teaching around the edges of the platter and provide the children with many different textured objects to sort. Discuss the colour names and the objects as the child sorts them.


2. Counting
Write the numbers from 1-6 on card and put them in the sections of the plate. Place any objects in the middle that can be used for counting. You could use dried beans, pasta, buttons, counters, small toys or shells. Help your child to identify the numbers and count the objects correctly. Older children could have the numbers 10-16 or any multiples of ten.


3. Invitation To Play
Children are definitely more inclined to explore play situations when objects are presented to them in a creative, orderly and interesting way. Try to use natural materials with little toys and change these regularly to encourage your child to explore, create and play. Just wait and see how creative and absorbed your child can be.


4. Playdough Storeage
Use the platter to hold materials to extend the learning at the playdough table. Absolutely anything can be used in conjunction with the playdough depending on what theme you are talking about. As we have just had Mother's Day, this was a pretend baking station. I put out materials to make playdough cup cakes... sprinkles, patty cases, spoons, doilies, match sticks and playdough.


5. Threading Station
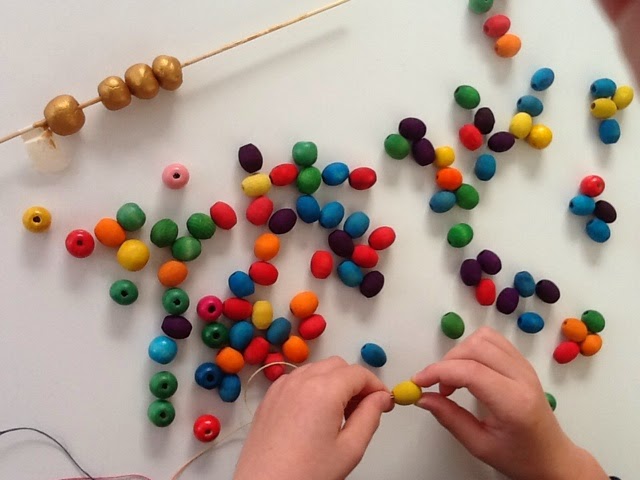
Here I gave the children a variety of threading materials including straws, pasta, a variety of wooden and plastic beads and cardboard shapes. You could include felt, material, shells with wholes, bottle tops or patty cases. Anything can be used as long as you can put a whole in the object.


6. Invitation To Get Crafty
I used the platter as a craft storage container. I included glue, scissors and a variety of craft materials. Use your imagination to fill each compartment with interesting and creative materials. Your child will love using anything you can find as long as they have glue!!


Try using the platter in your home or classroom and see what a great and versatile resource it is.
Let me know what you think.
Niccola
Tuesday, 6 May 2014

Mother's Day Activities

It is Mother's Day this Sunday here in Australia. At school we have been very busy making some cute presents for our Mums.
Every year I try to think of different ideas but it can be quite challenging to think of activities that 3 year olds can manage on their own.

I always love photos, and this year I took cute photos of the children holding a giant red heart with a red backdrop. I then mounted them on red and white spotty paper and voila- they would melt any Mums heart.


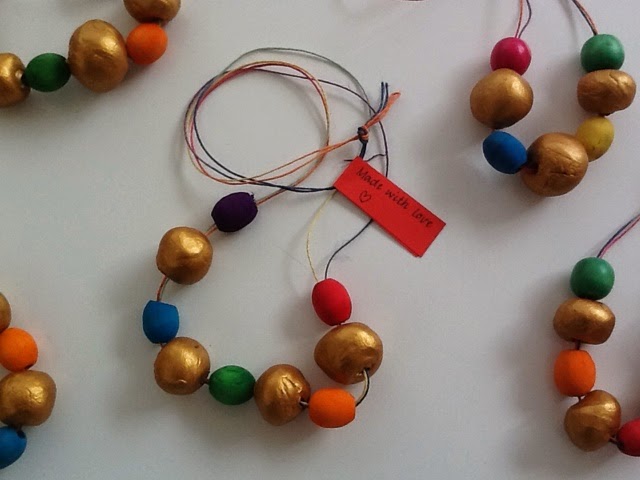
We also used some air dried clay to roll balls ( well sort of ball shapes!! ) This was a great fine motor activity for 3 year olds. Each child tried to roll 3 or 4 balls by themselves and then I used a skewer to put a whole in them.


They were dry enough the following day to paint. They threaded their beads on the skewer and painted them all gold- Mums love gold! Older children could paint each bead a different colour. Perhaps a range of pastel colours.


 We thread the beads in a pattern with other wooden beads on coloured thread. I think they look pretty good.


We made simple wrapping paper that the children loved and it smelt good too. We spread shaving cream in the bottom of the tray and then children added pink and purple paint to the shaving cream and spread it around with paint brushes.


The cards were also simple and the children were able to do this themselves too. I cut bubble wrap into heart shapes and the children printed them with white paint onto pink cards. I wrote a personal message on every card about why the children love their Mums.


The finished present.


I'm sure the Mums will love their hand made gifts.
Happy Mother's Day to all of the Mums celebrating on Sunday.
Niccola