Tuesday, 8 September 2015

Sensory Spaghetti

This is a super easy, fun and inexpensive sensory activity that little children will LOVE!!!


To make sensory spaghetti, I bought the cheapest spaghetti from the supermarket. I boiled it for a few minutes less than the recommended time so it was quite firm, drained it and put it in four plastic bags.
I added a few drops of food colouring and a few drops of olive oil into the hot pasta and mixed it by shaking the bag.


I added different containers, scissors, chop sticks, tongs and cooking utensils and put it all in the water trolley.


Some children wanted to keep the spaghetti as it was in neat piles according to the colour but that only lasted a few minutes!!!
Soon the fun began...


Children were busy cutting, picking up, filling containers, talking, sharing, feeling, squashing, role playing, making discoveries and experimenting.....


This activity held the children's attention for a long time. It was a great sensory activity that provided many learning opportunities. When we finish playing with it, we can throw it to the chickens to eat, for more fun and learning.
Niccola

Tuesday, 1 September 2015

Father's Day Mugs

It's Father's Day this Sunday here in Australia, so at school we have been busy making cards, wrapping paper and presents for our wonderful Dads. As you know, I like to try different ideas, use different materials and try not to repeat activities. This can be quite a challenge when thinking of activities for three year olds!!!

I started this activity with a plan that quickly changed once I started. My original idea was to let the children draw onto the mugs with the porcelain pen, however they would have smudged their design and it would had been very tricky to draw on the curved surface. I then thought the children could do hand prints with porcelain paint. Instead, I asked the children to draw their Dad on a piece of paper and I transferred their design using carbon paper onto the mug. They watched their drawing come to life on their mug.

1. Take a mug, a porcelain pen, your design and some carbon paper.


2. Trace the design onto the mug using the carbon paper.

3. Using the porcelain pen, go over the design.

4. Let the paint set for 24 hours and then bake in the oven according to the instructions.


Now we just have to wrap them in the beautiful paper we made, attach our cards and they are ready to go!!
I'm sure the Dads will love them.
Niccola

Tuesday, 25 August 2015

Painting Prompts

I love putting out a variety of paints, including water colours, dye and acrylic paints for children to experiment, create, mix and explore. However, sometimes I give them a prompt to challenge them and let them explore different possibilities. These include setting up still life settings like fruit or flowers, cutting the paper into different shapes or drawing shapes or squiggles for children to add and create.

Here is a super cute idea that I did when we were reading and talking about Fairy Tales.
I cut little silver crowns and stapled them on the top of the painting paper.


The children were so excited to paint a King, Queen, Prince or Princess wearing the crown. This was a wonderful language activity as the children were discussing their creations with one another and the staff.


Once dry, we cut them out and put them around our 'Big Tall Tower'.


Do you think your children would enjoy this activity?
Niccola

Tuesday, 18 August 2015

Playdough Doughnuts

Here is a fun idea for the playdough table.....chocolate doughnuts!!


Set up your doughnut shop-
I added plastic plates with drawings of doughnuts, glitter, sequins, sparkly shapes and 100's and 1000's. I also added paper bags and playdough of course.


I added the plastic plates with doughnuts to reinforce the numbers 1-6.


The children made the chocolate doughnuts and added the various sprinkles. Some doughnuts went into the bags, others were counted on plates and some were sold to friends at the shop. This is such a simple activity but also is a great fine motor activity, helps children with counting and number recognition, promotes creative play and language and helps reinforce the 'circle' shape.


Mountains of doughnuts were made!!


Mountains of glitter was used!!


...... And lots of fun was had.
Niccola
Tuesday, 11 August 2015

Loose Parts In The Playground

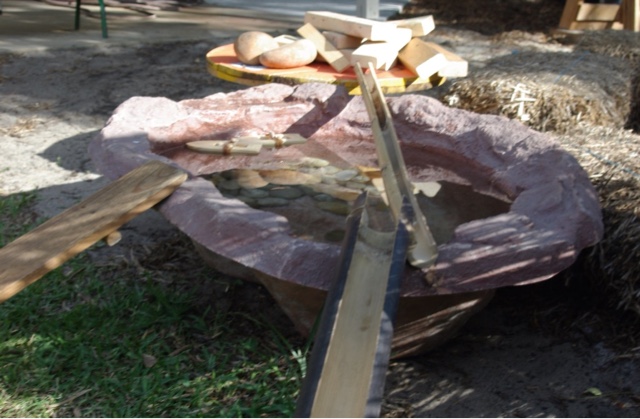
Here are some examples of how I have used loose parts in the playground at my school. There are many, many more materials that can be used, but these are easily sourced. Loose parts are fantastic as they are open ended and encourage creativity, imagination and problem solving. The children can move, design and invent uses for the materials and as a result their play is creative, and always evolving.

1. Tree Cookies, Logs, Sticks


2. Rocks, Pebbles


3. Hay Bales


4. Fabric Pieces


5. Cooking Utensils


6. Wood, Bricks


7. Bamboo Tubes


8. Baskets, Nuts, Bark


9. Plastic Tubes, Funnels


10. Electrical Reels

What loose parts do your children love?
Niccola

Tuesday, 4 August 2015

Fairy Fun

We have been having a lot of fun reading Fairy Tales, making fairies, painting Kings and Queens, making magic wands and playing in our Indoor Fairy Garden.
Today I thought I would share a very simple idea for making a fairy.... Suitable for three year olds!!

Pop Stick Fairies


I used hot glue to stick some tulle wings on a jumbo pop stick.


The children twisted some pipe cleaner arms on the pop stick and drew a little face.


They then painted some beautiful fairy clothes with small brushes.


So so cute- don't you think?
Niccola