Tuesday, 25 March 2014

Easter Pebbles


I have a 'wonder table' or 'nature table' permanently set up in the classroom that has beautiful collections of natural materials for the children to use whenever they like and however they like.

I change the main display regularly and sometimes paint or draw on the natural materials so they can be used for a specific purpose.

This week, I painted patterns on 20 pebbles to resemble Easter Eggs. I repeated the pattern so that the pebbles could be used in pairs.

I painted a main colour in an oval shape first.


I them used a few colours to paint some simple patterns.


The children enjoyed finding the matching pairs, counting the eggs, putting them in egg cartons, putting them in small baskets, lining them up and enjoyed having some quiet time holding and looking at the different shapes and patterns.


We also had a lot of fun playing a simple memory game by turning the pebbles over one at a time to find a pair. This was a great language and turn taking activity.


This is a simple activity that doesn't require too much artistic ability and can be used in many different ways.

Have a go at making some of your own Easter Pebbles.
Niccola


Tuesday, 18 March 2014

A Village Kids Can Make


Last week I showed you a very simple woodwork project that you could do with young children. This week I would like to share the whole village we have been busy making.


We started with a road map.
I roughly marked the roads with tape and then painted with chalkboard paint so the children can put their own road markings on.


The children painted the grass with green edicole dye. This works best if the fabric is wet. The children took turns spraying the mat with water while the other children painted with the green dye.


Then we made our houses.
I covered some cereal boxes, tissue boxes and milk cartons with white paper.


The children printed brick patterns with foam blocks all over their boxes.


The children painted corrugated cardboard for their roof.


Once dry, we decorated with a variety of collage materials and drew our family members in the windows.


Of course we needed people in our village.
The children drew pictures of themselves that I laminated and attached to blocks. On the other side I attached photos of the children.


A village needs trees.
We printed magnificent leaves, laminated them and attached them to blocks as our beautiful trees.


Finally, we made our beautiful woodwork cars.


And voila !!


Each step of the way the children have thoroughly enjoyed the process, but have LOVED playing with the final project.


Tuesday, 11 March 2014

Woodwork With 3 Year Olds!


Woodwork and a class of 3 year year olds- I know what your thinking....crazy teacher!
This project, however, is the perfect woodwork project for young children.

Before I began, I explained that tools were only ever to be used with an adult at home or at school and went through some of the dangers of using hammers and nails.


The hammering part was done one on one and the rest of the nails and hammers were put safely out of the other childrens reach. The biggest problem was that everyone wanted to do it at the same time.
It is very had to wait your turn when you are going to make something very exciting.

I was lucky enough to get the wood for free and cut to size.


The children painted the wood however they liked. I explained that it was going to be a car so we talked about the parts of the car....the lights, doors, windows etc.


Once they were dry we began to attach the wheels.

Each child counted 4 wheels and 4 nails.


I hammered the nails through the lids and then we attached the wheels to the car body. The lids were fabulous because they held the nails securely in place and no fingers were hurt!!


The children had a great time driving them around.


We are working on a class village at the moment so stay tuned for next week when I show you their fantastic houses.

Give woodwork a try at home or in your classroom. The children love it!!
Niccola

Tuesday, 4 March 2014

Tree Trunks and Play!


A couple of weeks ago my neighbours had a team of tree loppers in to trim some of their magnificent Australian Gum Trees. I have been collecting twigs, branches, stumps and bark for school but have had trouble getting someone to cut me "tree cookies." 
I ran over and they agreed to cut me some slices of branches that they had already cut.

I love these because they can be used for anything. They stimulate curiosity, imagination, thinking, problem solving, creativity and a sense of wonder.
They provide a wonderful sensory experience and are a perfect platform to stimulate play situations.

So far we have used the "tree cookies" in a variety of ways, both inside and outside the classroom.


Simple Stepping Stones that can be easily moved and used with other outdoor resources.


I put them in the block and construction area.


Of course they are a fabulous addition to the sandpit.


I put them in the playdough area which provides a lovely invitation to play.


Good luck with getting some "tree cookies" to inspire some lovely nature based play in your home or classroom.
Niccola

Tuesday, 25 February 2014

10 Sensational Stick Activities


I love using natural materials in my programme and try to incorporate them across all learning areas.
Here are TEN sensational ways to use sticks to enhance the learning experience.     

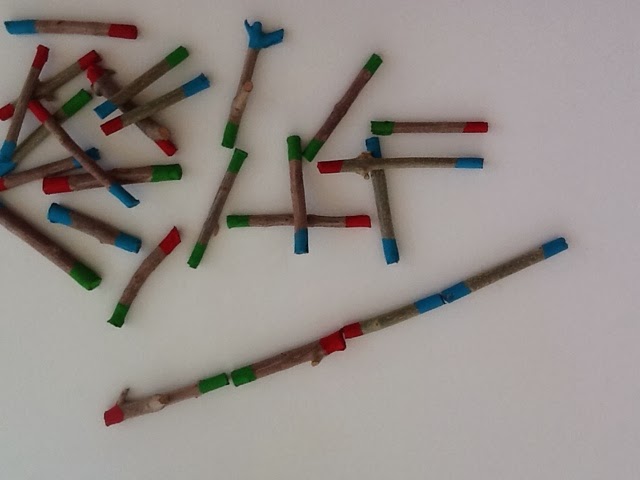
1. Making letters with STICKS


2. STICK wands


3. STICKS in the block area


4. Small world play including STICKS


5. STICK dominoes


6. Painting with and on STICKS


7. Ordering STICKS according to length


8. Making pictures with STICKS


9. STICKS for stirring mud pies


10. STICKS in the playdough


Tuesday, 18 February 2014

Letter Recognition


We all know that it is so important to provide our young children with a variety of activities to help develop their fine motor skills.


This is a great activity that is simple to make and can be used on the light table or on any flat surface. It is a wonderful fine motor activity and also helps the child identify the first letter of their name.


I used large confetti but you could use circle stickers or just cut up small pieces of paper and form the first letter of your child's name. If you are making this activity for one child, you could of course, make every letter of their name.


I made the letters to use on the light table at school so I glued the confetti in laminating sheets. You could use clear contact or cardboard if you don't need it to be transparent.

Encourage the children to try and find the first letter of their name,  and using their thumb and pointer finger, place any of the objects on the circles, one at a time. Discussions on the letter name, the sound the letter makes, the colours and counting the objects as they put them down would further enhance the learning experience .
Sample of the activity on a table ...Pom poms, counters, lids, buttons


Sample of the activity on the light table ...... Bottle tops, pom poms, counters, glass pebbles


Have fun and let me know how you go.
Niccola